ID/OD GAGES
ID/OD gages are comparator type gages designed for dimensional measurement or assessment of the internal/external diameter of components. Bore gages and Snap gages are available from Kent that employ variable or fixed mechanical, electronic or pneumatic technologies. Specialized bore gages have the capability to measure the degree of roundness (lobes), taper or internal steps, grooves or serrations. Mechanical gages use comparison or the physical movement and displacement of a gaging element (e.g., spindle, slide, stem) to determine the dimensions of a part or feature. Micrometers, calipers, indicators, plug gages, ring gages or snap gages are examples of mechanical gages.
Large Diameter Gages
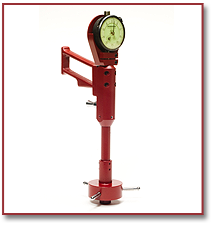
Large diameter gages are primarily “single dimension” gages, to record inside and outside dimensions of cylindrical products at one unique application.

Snap Gages
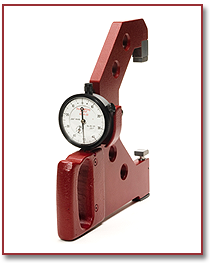
The snap gage is a dial indicator comparator type of ID/OD gage, which is adjustable and calibrated for a fixed dimension. It has two carbide gaging contacts, one fixed and one in motion, with an adjustable steel reference backstop. The design, reliability and selection of gaging contacts make this gage one of the highest performers in the industry for measuring outside diameters of cylindrical form. Snap gages are standard when furnished with a flat parallel carbide anvils and a dial indicator with .0001” graduations. Alternate gaging contacts and dial indicators with increments in .001” or .0005” are available, as well as other modifications demanded by the gaging situation. Our snap gages range diameters are from .00” – 10”.
Bore Gages
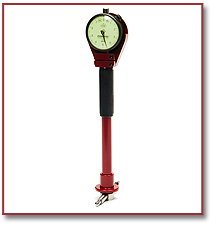
Bore gages are comparator instruments designed to evaluate conditions of internal diameters. Readings on the dial indicator can be interpreted as limited fluctuations similar to “go” and “not go” readings for quick inspections, or they can be easily converted to a dimensional value.
They are constructed to allow range extensions and adapters to be interchanged freely to increase the range of the gage without loss of accuracy or balance. Each model listed below has its own set of gaging tips and range extensions that form a complete set for that gage with the range as indicated. The bore gage is also available as a single dimension gage.
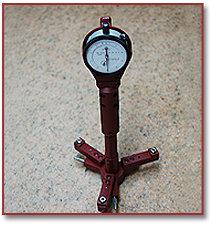
Bore gages have a two point gaging and three point alignment design principle. The centralizers are permanently fixed within the centralizing head and keep the gaging pin on center during checking. Kent offers an adjustable set master for use as the reference master for the bore gages; however, minimum effort and maximum reliability usually result through the use of a Master ring as a reference master. Bore gages are furnished with Dial Indicators graduated .0001” (.001” or .0005” graduated indicators available upon request.
Our bore gages use the following ranges:
| Range: | Gaging Depth: |
| .25 – .500 | 2” |
| .500 – 1.000 | 3” |
| 1.000 – 1.750 | 3” |
| 1.750 – 3.000 | 4” |
| 3.000 -6.000 | 5” |
| 6.000 – 13.000 | 6” |


Retractable Bore Gages
The retractable bore gage is designed to check internal diameter conditions requiring retraction of the gaging contacts to allow entry in recessed areas.
Ranges for our retractable bore gages are 1.500 – 3.000 and 3.000 – 6.000.
Internal Pitch Diameter Bore Gages
The internal pitch diameter gage is a specific “single dimension” gage utilizing Our internal pitch bore gages use the following ranges:
| Range: | Gaging Depth: |
| .500 – 1.000 | 3” |
| 1.000 – 1.750 | 3” |
| 1.750 – 3.000 | 5” |
| 3.000 -6.000 | 6” |
| 6.000 – 13.000 | 6” |
Click here for detailed info on our internal pitch diameter bore gages.


Kent Gage & Tool Company, Inc. • 29 Victory Lane, Poughkeepsie NY 12603 • 845-868-7038 • Fax: 845-868-7259
Copyright © Kent Gage & Tool Company, Inc. All rights reserved. Site Designed and hosted by Design-2-Part Web Design.
